BlueSnap gateway setup
To complete the set up for your BlueSnap gateway, you will first need to log in to your account at https://cp.bluesnap.com/jsp/developer_login.jsp. If you do not know your username, you will want to check your inbox for an email from support@bluesnap.com. You can then direct to the site noted above and select the Forgot Password option.
Be sure to check your email quarantine, SPAM and junk folders to ensure it was not filtered to one of these locations.
Once logged into your BlueSnap gateway, direct to Settings + API Settings.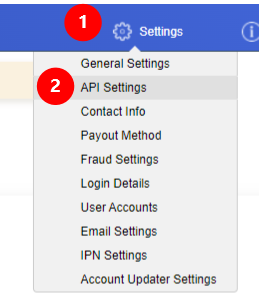
-
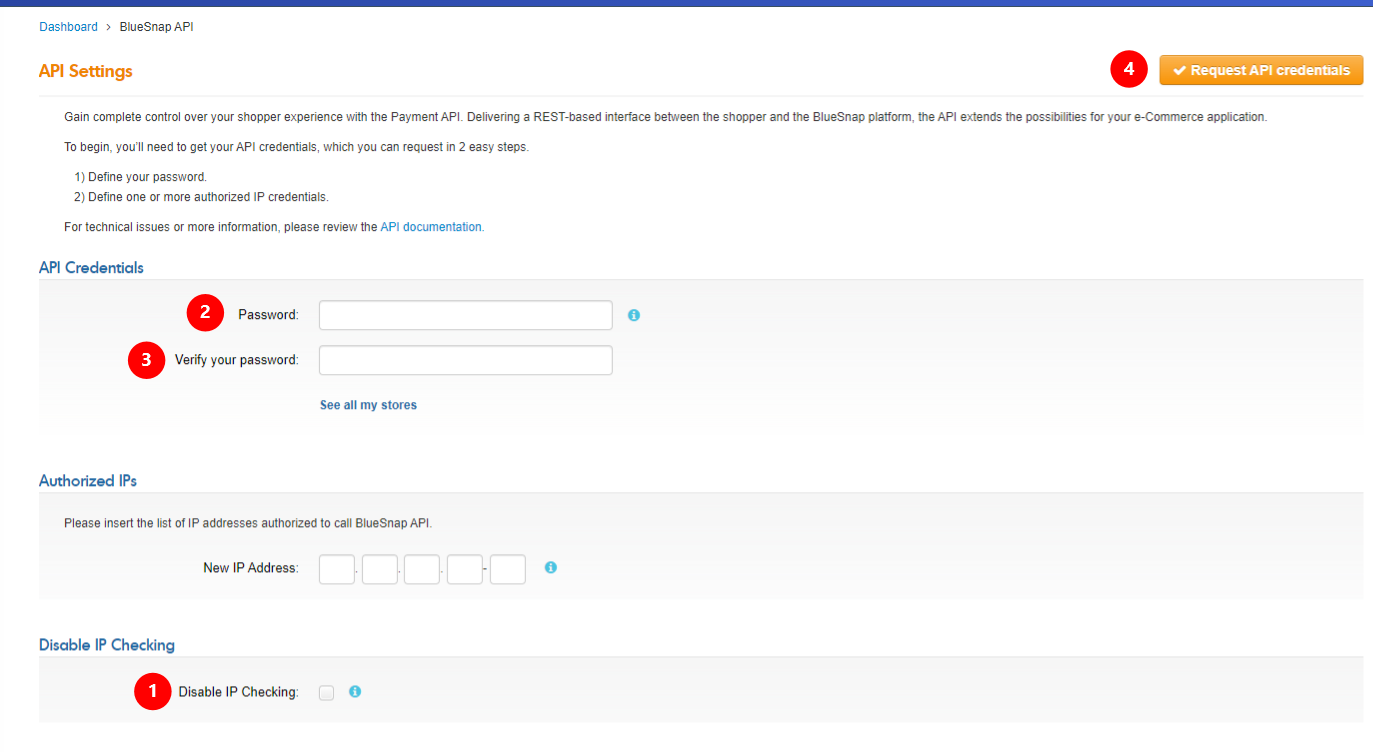
In the API settings, you’ll first want to "Disable IP Checking" by checking the box.
-
Create a secure password (suggested to generate this password with a password generator).
-
Verify the password.
-
Request API credentials.
NOTE Ensure the generated API User Key and password you created are accessible as you must enter it within the ConnectBooster portal integration settings.
ConnectBooster portal setup
Log in to your ConnectBooster portal and direct to Integrations in the left-hand menu.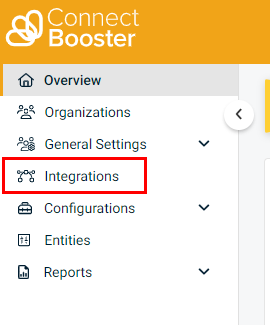
Select the 3 dots found in the upper right corner of your BlueSnap gateway integration and select Settings.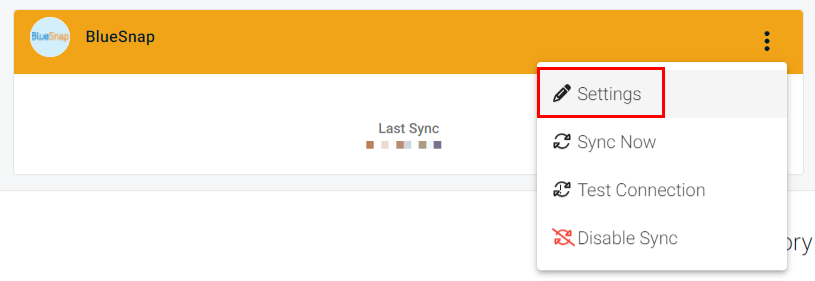
If you do not see the BlueSnap integration in your portal, please submit a ticket through our Helpdesk.
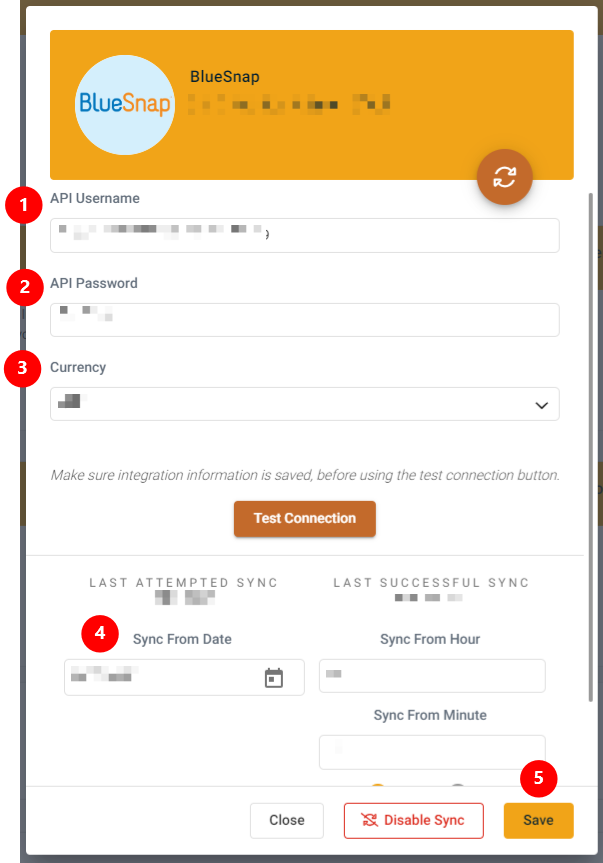
-
Enter the API Username (API User Key).
-
Enter the API password you generated for your API setting within BlueSnap.
-
Select your currency from the drop-down menu. If you do not see the correct currency listed, please submit a ticket through our Helpdesk to ensure this is configured correctly prior to running your first sync.
-
Set the Sync From Date to a date within the last year. A date must be set in order for a successful sync to initiate and complete.
-
Save.
Running your first sync
Once you've confirmed all steps above have been completed, you will then want to click the 3 dots in the upper right corner of your BlueSnap integration and select Test Connection.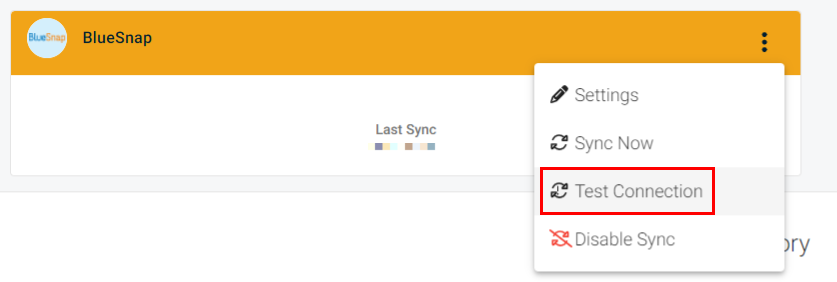
You should then see a successful test notification appear in the lower left-hand corner. Once this confirmation is seen, you can then select the 3 dots in the upper right corner of the BlueSnap integration and select Sync Now.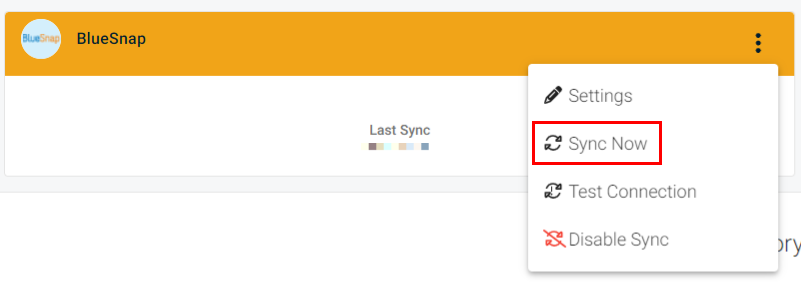
Steps to complete in your BlueSnap gateway
-
General Settings - Email Settings - Please check and verify all appropriate email addresses are set.
-
General Settings - Branding Settings - Please check and make sure you have both the Default Statement Descriptor and Support Phone Number populated. Default Statement Descriptor needs to be the company name or web address.
-
Payout Method - Payment Settings - Please fill in the banking details in order to be paid out appropriately. Be sure to set a value for the Refund Reserve. The [Payout setup guide] (https://support.bluesnap.com/docs/payout-method) can assist further.


