Microsoft Dynamics Business Central setup guide
Overview
Use this guide for configuring ConnectBooster to synchronize with Dynamics 365 Business Central. This guide includes step-by-step instructions for installing the required Extension. After connection is established, be certain to set your organization's preferred reconciliation behavior.
Preparation
To help ensure smooth integration, the below should be verified before starting.
- Means to coordinate with your IT Admin, or whomever manages your Microsoft Entra ID.
- Logged in to Business Central with Full Admin access.
- You have means to "Grant Consent" for a new Microsoft Entra ID Application Card.
- Admin level access to your ConnectBooster Portal account.
Extension installation
Navigate to our listing on Microsoft AppSource
Select the "Get it now" button.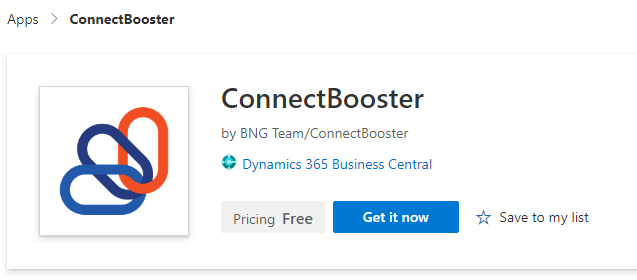
NOTE Make sure you are logged into a Microsoft account from the same organization, as the instance of Business Central which you plan to have communicating with your ConnectBooster portal.
Confirm the proper username appears and confirm you wish to get the extension.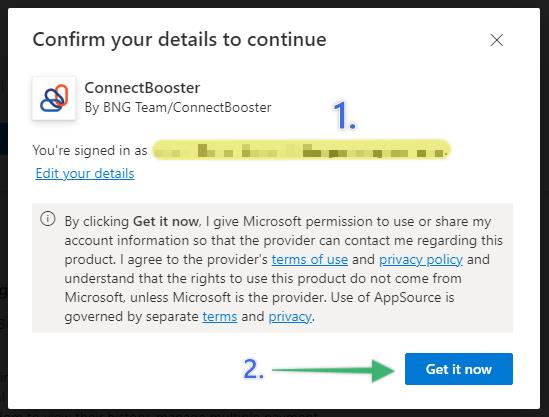
Select the BC Company instance in which to have the extension installed.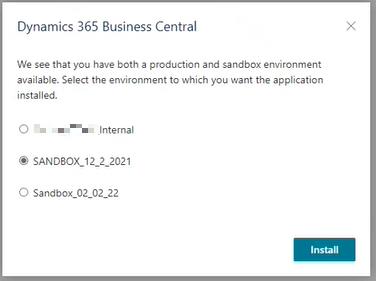
After you confirm you wish to proceed with the install, you should receive a confirmation that the installation is in progress.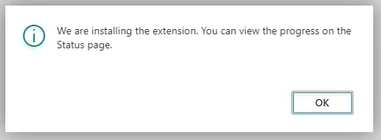
To check progress, or confirm installation has succeed, you may look in BC under the Installed Extensions screen, using Manage + Deployment Status.

Configure reconciliation preferences
Now your organization needs to make a few setup decisions with how you want the integration to operate.
Navigate to the ConnectBooster setup within Business Central.
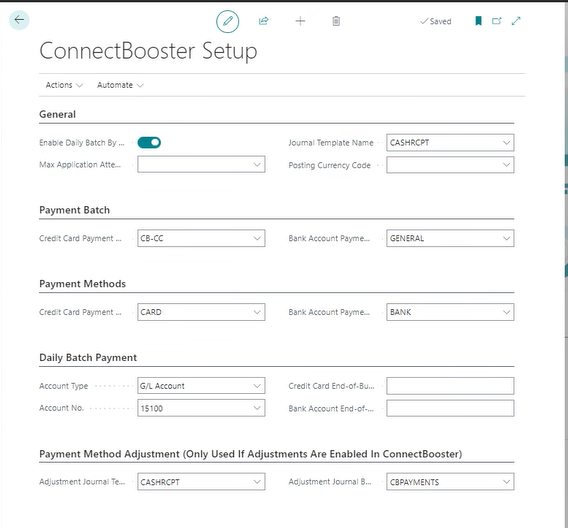
ConnectBooster setup:
General
- Reconciliation Preference
- Defines whether cash receipts are individually recorded to the bank deposit ledger, or if they are recorded as batch totals for credit card and ACH activity for each day.
- Journal Template Name
The first decision surrounds how payments are recorded and posted back into Business Central.
In this context, a payment is defined as transactions done with Payment Method types Credit Card, or E-Check (ACH).
Your options:
1. Singular Payment Posting (more granular, harder to reconcile)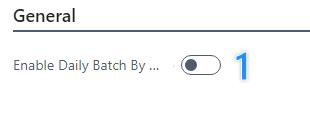
2. Daily Batch - Split by Payment Method Type (easier to reconcile)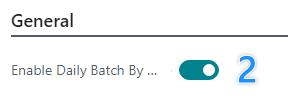
The reconciliation method you choose will immediately change which settings are required.
Option 1: Fields and functions
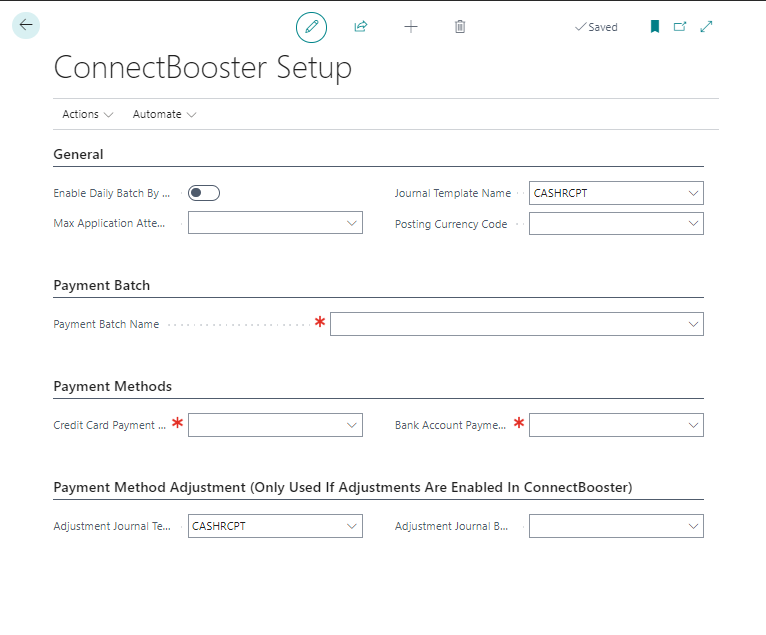
Payment batch
- Payment batch name
- Create and select a payment batch template which will be used for both credit card and bank based ConnectBooster payments
- NOTE: This template must include the bank account to which you would like cash receipts recorded, as the balancing account number.
Payment methods
- Credit card payment
- Select existing record or create a new code.
- Used on the cash receipt to record the organization's method of payment when executed using a credit card
- NO balancing account is necessary for this entry.
- Bank account payment
- Select existing record or create a new code
- Used on the Cash Receipt to record the organization's method of payment when executed using a bank account
Option 2: Fields and functions
Payment batch
- Credit card payment batch name
- Create and select a payment batch template which will be used for Credit Card based ConnectBooster payments
- This template should NOT include a Balancing Account number.
- Bank account payment batch name
- Create and select a payment batch template which will be used for Bank based ConnectBooster payments
- This template should NOT include a Balancing Account number.
Payment methods
- Credit card payment
- Select existing record or create a new code.
- Used on the Cash Receipt to record the organization's method of payment when executed using a credit card
- NO Balancing account is necessary for this entry.
- Bank account payment
- Select existing record or create a new code
- Used on the Cash Receipt to record the organization's method of payment when executed using a bank account
- NO Balancing account is necessary for this entry.
Daily batch payment
- Account type
- Type of account where the lump sum deposit journal line will post. Most typically a Bank Account type
- Account number
- Account number where the lump sum deposit journal line will post.
- Credit card end-of-business day
- Set the hour to finalize the point in which payments after this point count as the next day's batch. Latest suggested cut-off time is 8:00 pm EST.
- Bank account end-of-business day
- Set the hour to finalize the point in which payments after this point count as the next day's batch. Latest suggested cut-off time is 6:00 pm EST.
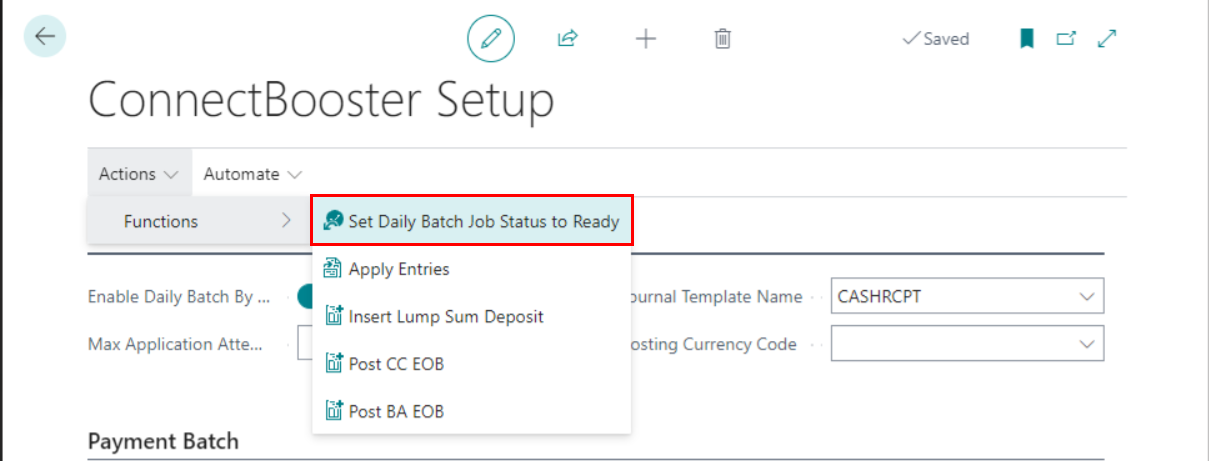
NOTE When using Option #2, after configuring your preferences as described above, you will need to set the Daily Batch Job Status to "Ready".
Do this under Actions + Functions.
Azure App registration - authorization
In order for ConnectBooster to establish connection with Business Central, via the latest OAuth standard, your IT Administrator will need to create a new "App Registration" in Microsoft Entra ID.
Once the values/credentials are generated in your Azure environment, they must be subsequently entered in both Business Central and your ConnectBooster portal (under Settings Integrations).
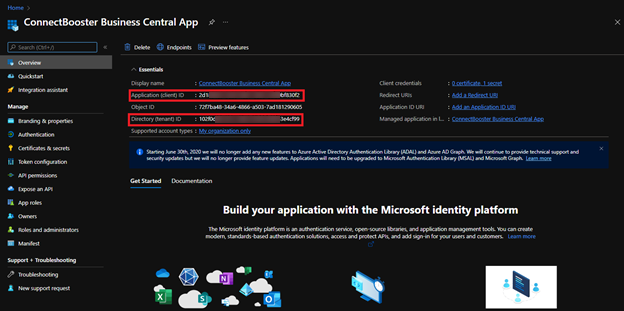
1. Create a new “App registration” in Microsoft Entra ID.
You may use this Redirect URL: https://businesscentral.dynamics.com/OAuthLanding.htm
Document the values:
2. Add Dynamics 365 Business Central permissions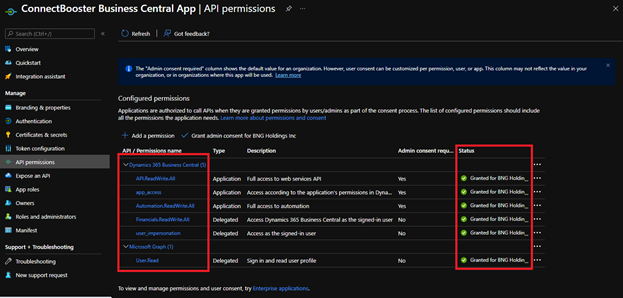
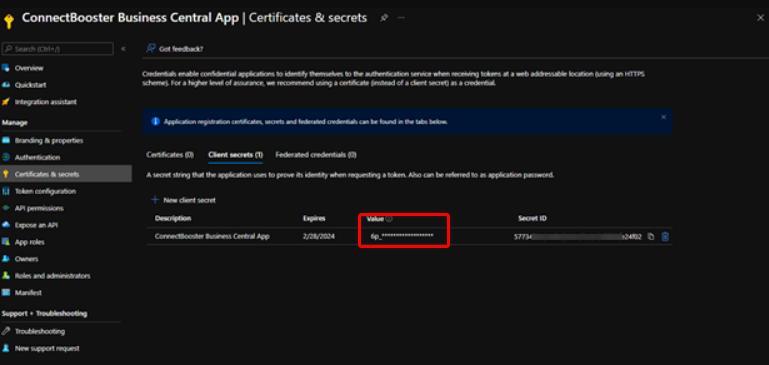
3. Create a new client secret
Microsoft Entra ID application card
Next, these values need to entered within Dynamics 365 Business Central.
1. Use the global search for "Microsoft Entra ID Applications"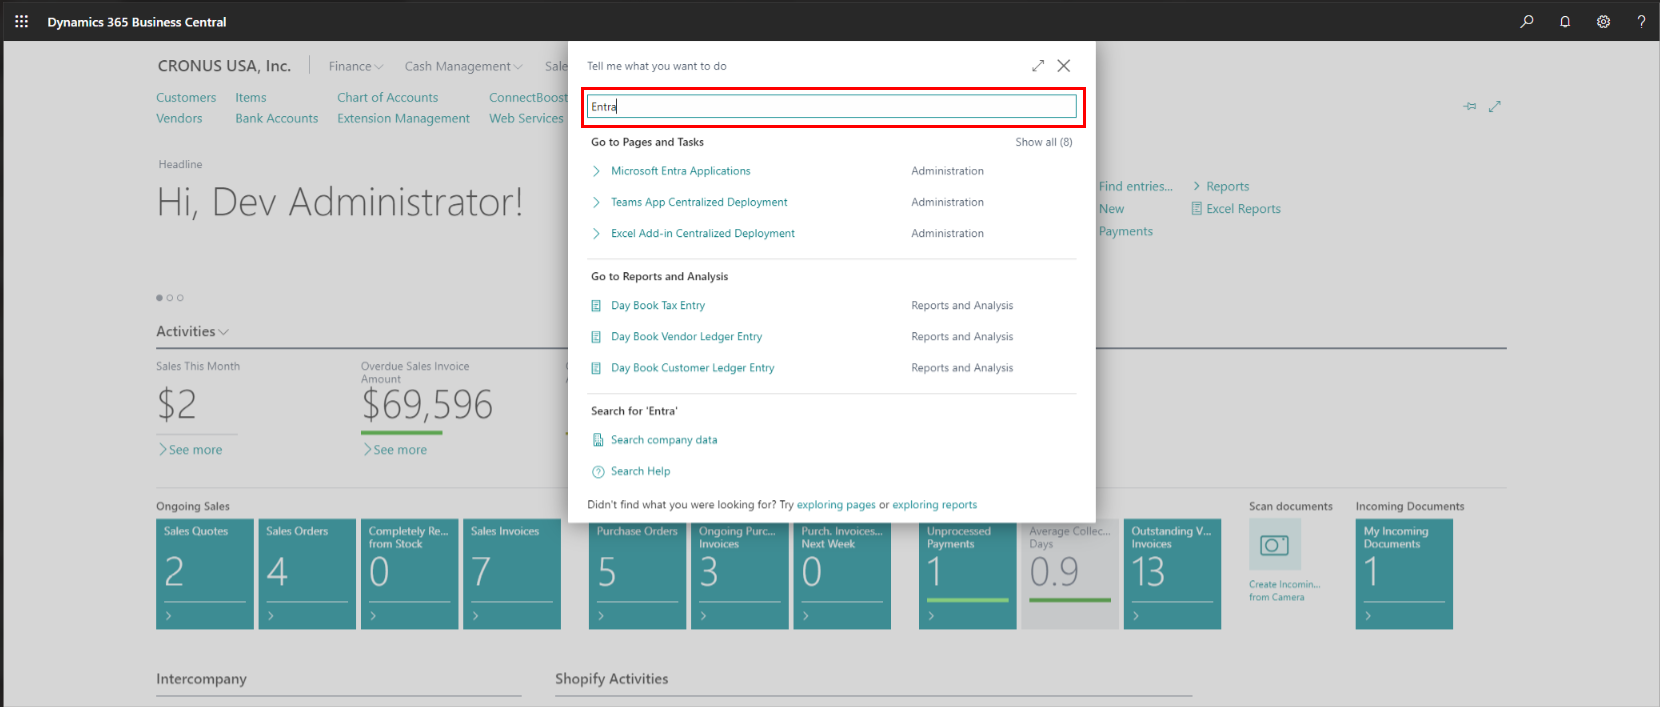
2. Add a New Card in order to "Grant Consent"
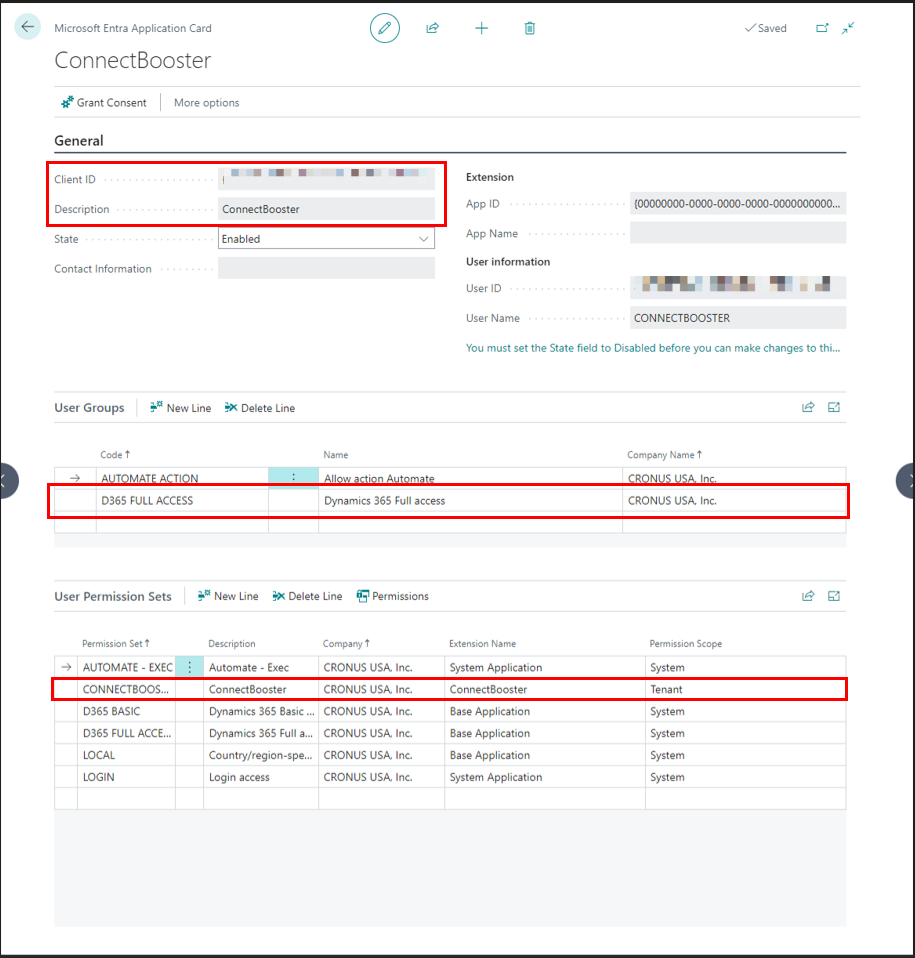
- Enter the previously documented Client ID
- Set the description to ConnectBooster
- Enroll User Groups permission & User Permission Set as pictured.
- User Groups + add D365 FULL ACCESS
NOTE If you intend to have multiple companies housed on a common BC tenant use this application card, leave the "Company Name" section blank when assigning the User Group permission.
- User Permission Sets + add ConnectBooster
IMPORTANT Using Permission Sets with less than admin type credentials may cause failure points with the integration. ConnectBooster has been tested with Full administrator rights.
ConnectBooster communication setup
You are now ready to undertake the final steps which will allow your Business Central instance to communicate with your new ConnectBooster portal.
You will need to retrieve two new values from BC, as well as make sure you have the Client, Tenant, and Secret ID values generated at the beginning of this guide at hand.
Company ID and endpoint URL
To find your company's OData V4 URL Endpoint:
Select any URL with the format https://api.businesscentral.dynamics.com/v2.0/
Copy the URL to clipboard up to /ODataV4.
NOTE If you right click and "copy link", the URL does NOT copy to clipboard as displayed. You need to click the URL, and copy directly from the browser URL bar.
Retrieve and document the Company ID
Within the ODataV4 URL, copy the Company ID (between the single quotes) to your clipboard separately.
At this point, you'll need to enter the previously documented values within your ConnectBooster portal.
- Navigate to Integrations.
- Select the Business Central Integration Card.
NOTE If this integration does not exist for you, please submit a ticket through our Helpdesk to have this added to your portal.
Enter the credentials:
- App: Application (Client) ID/Entra Application (Client) ID
- App: Directory (Tenant) ID
- App: Client Secret
- End Point URL
- Company ID
- Payment Method Adjustment Journal Batch Name
- Payment Method Adjustment Journal Template Name
- Toggling the Use Invoice "Pre Assigned No." field will tell ConnectBooster to show the sales invoice number over the post-sale invoice number pulled from your Business Central integration.
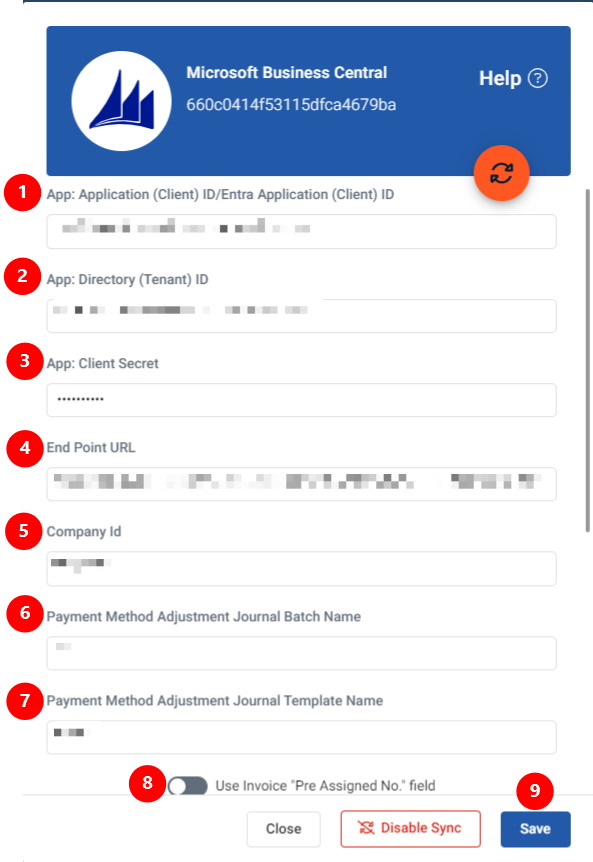
- Save the integration card, and validate via "Test Connection".
IMPORTANT It is recommended to leave the Use Invoice "Pre Assigned No." field toggle switch off unless you are using a third-party tool to assign your invoice numbers.
Once you see the successful test confirmation appear on screen, the integration should be connected!
A sync will begin within the hour, otherwise you may immediately initialize via "Sync Now".
If you encounter issues, please submit a ticket through our Helpdesk.

