BNG Gateway: ConnectBooster API security key
This article will walk you through the necessary steps to configure your BNG Gateway integration within the ConnectBooster portal. If you are trying to configure one of our compatible quoting tools into the BNG Gateway, refer to our BNG Gateway: API security key article.
Part 1: Creating a new BNG Gateway user
Log in to your BNG Gateway portal. This can be accessed here:
https://secure.bngpaymentgateway.com/
Navigate to Options + Settings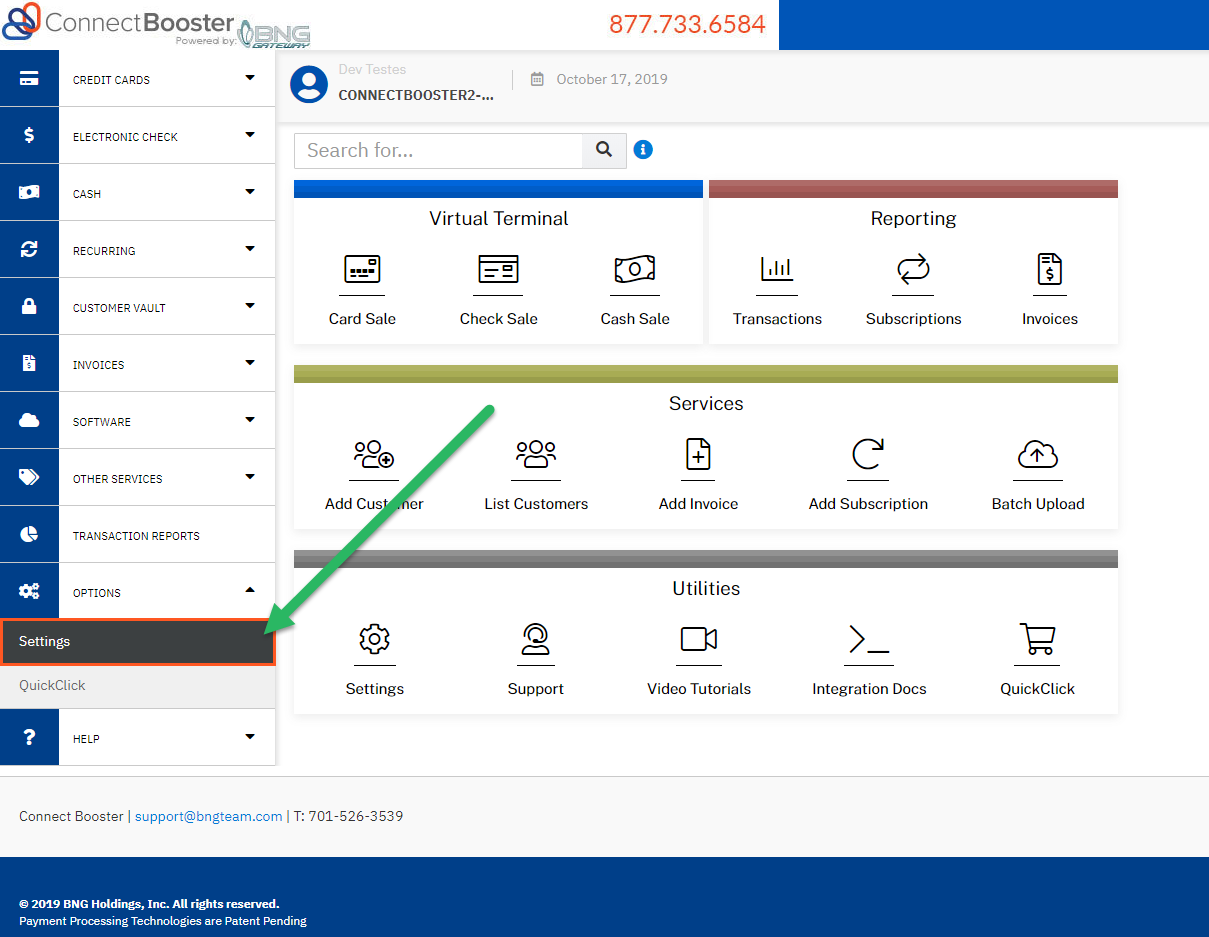
Under General Options + User Accounts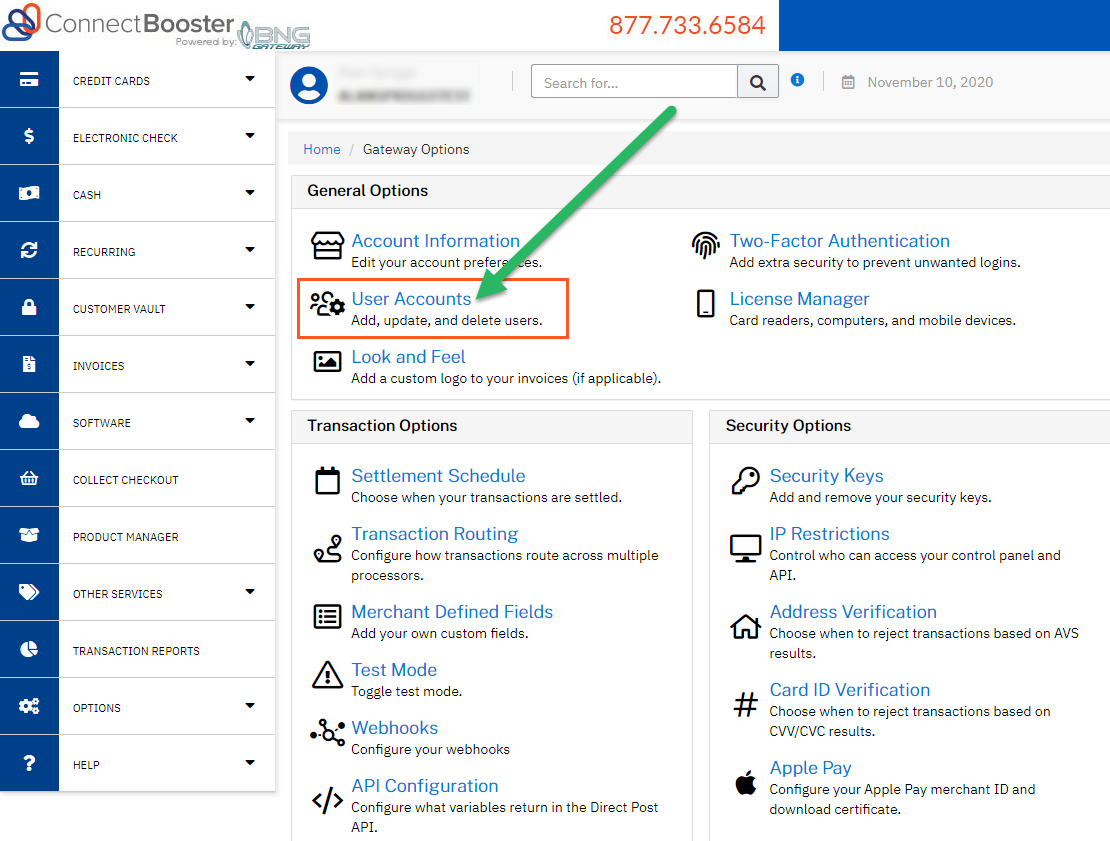
Select the button to "Add A New User"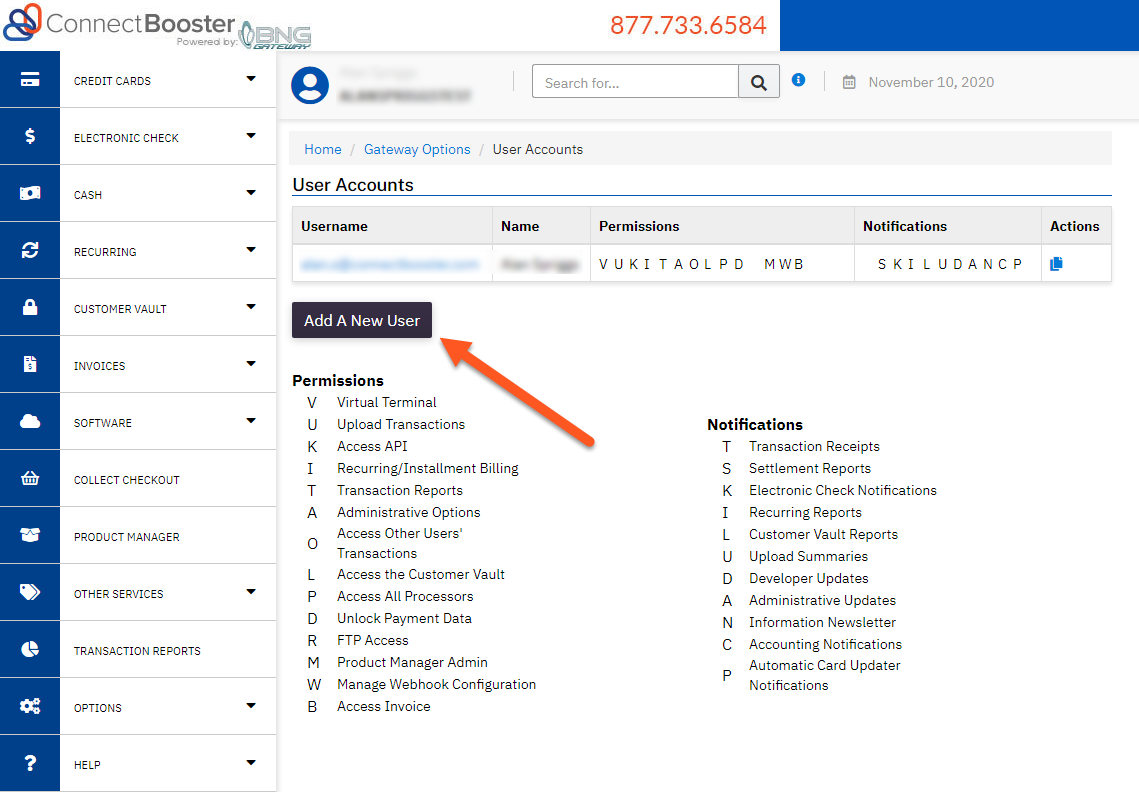
Complete the required fields to generate the account.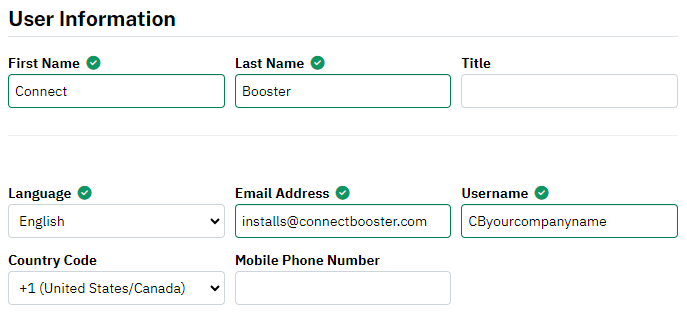
While no notifications will be sent to this account, you will need to enter a valid email address for this account.
Set User Permissions as Shown
.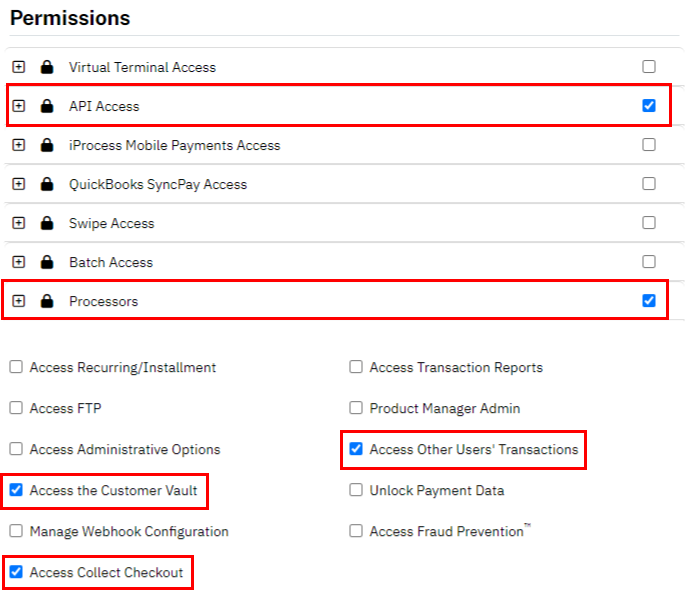
IMPORTANT Do not enable any notifications for this user account. Forgetting this step can cause excessive payment notifications to the email address tied to this user account.
Click "Create User" to finalize user setup.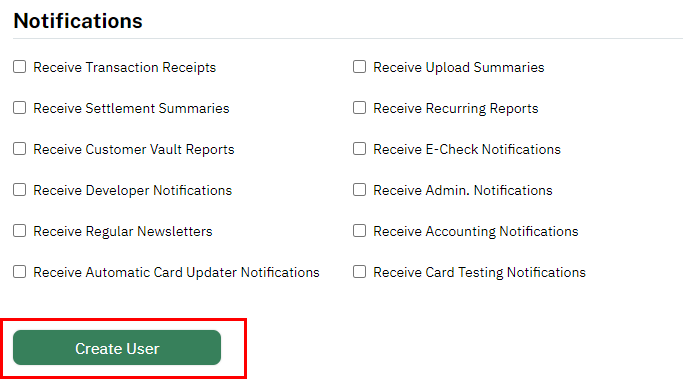
Part 2: API Security Key Creation
Navigate back to Options + Settings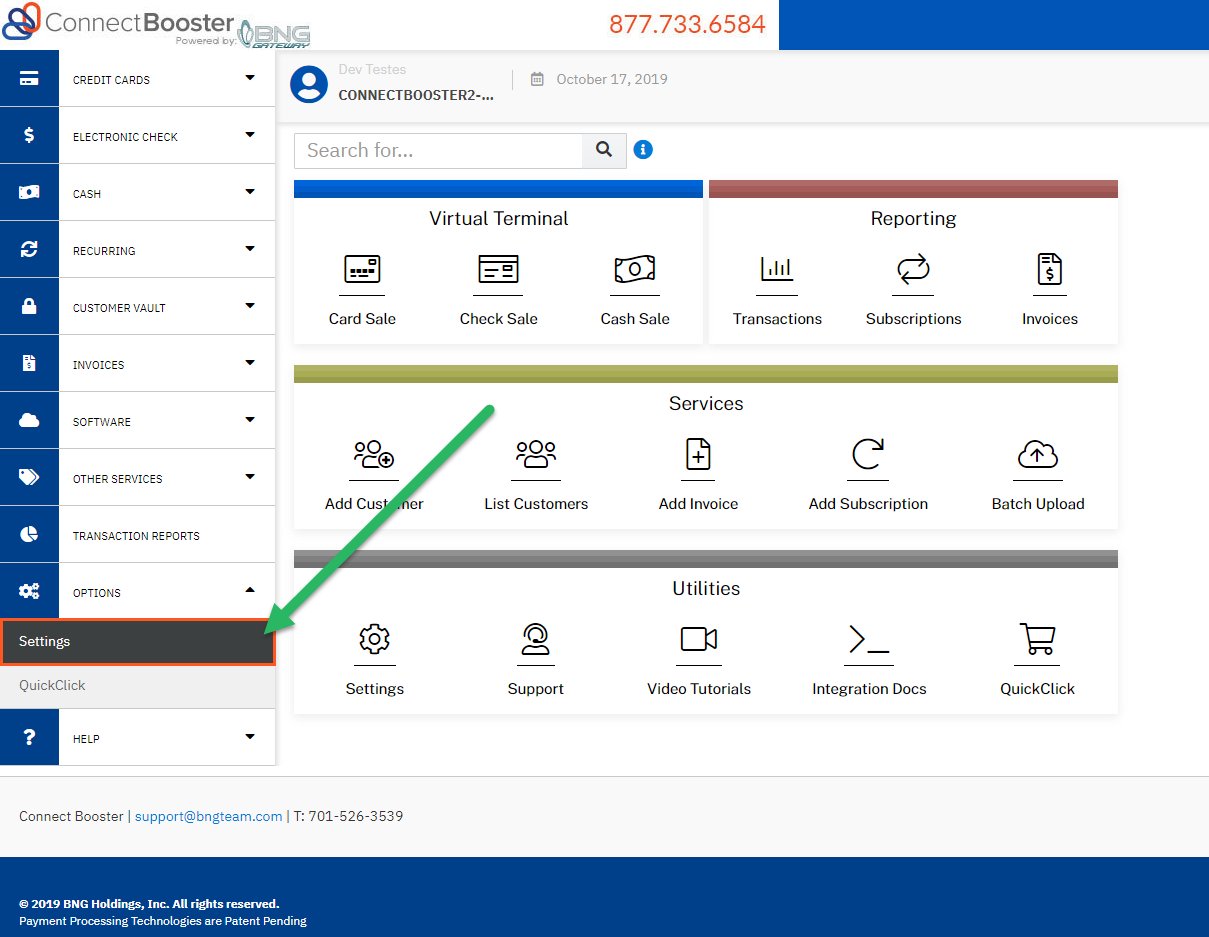
Navigate to Security Options + Security Keys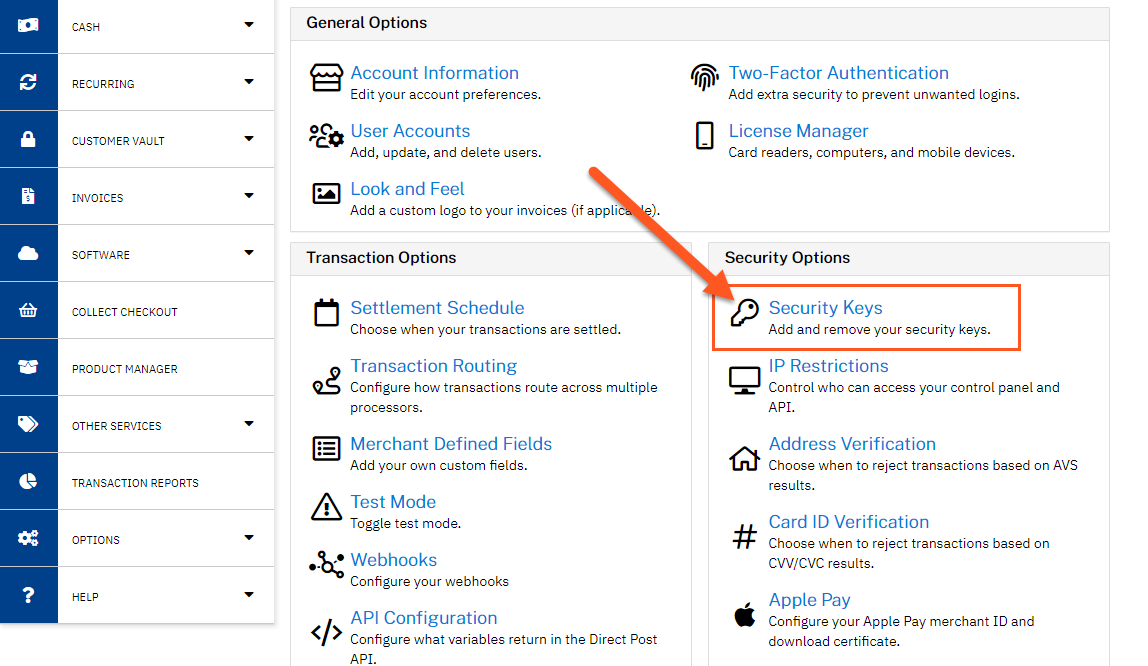
Select the "Add a New Private Key" button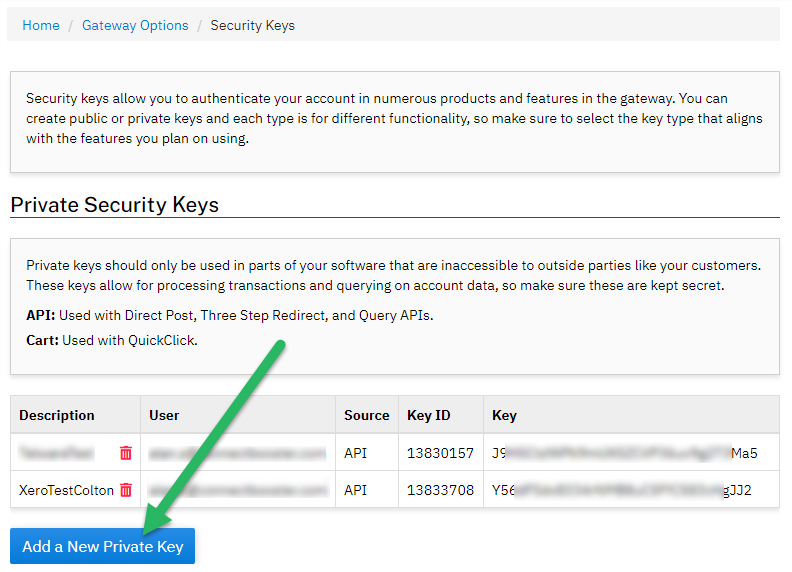
1. Enter a description for the Key Name (i.e., CBKey)
2. Assign the User you created in Part 1 above
3. Enable the Key Permission for use with the Gateway API
4. Select the Create button to finish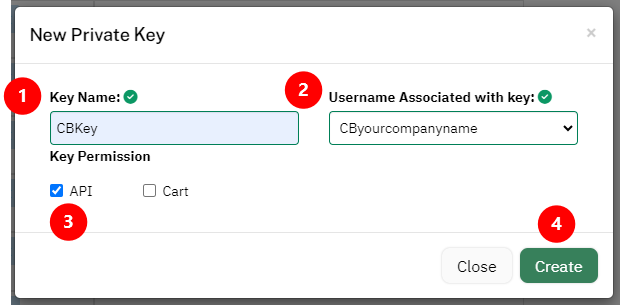
Lastly, copy the newly created API Key.
Part 3: ConnectBooster portal setup
In the ConnectBooster portal, direct to Integrations in the left-hand menu.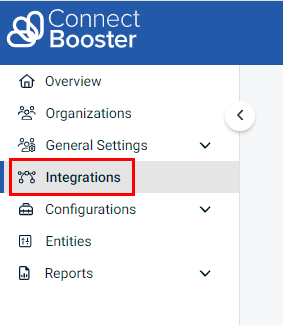
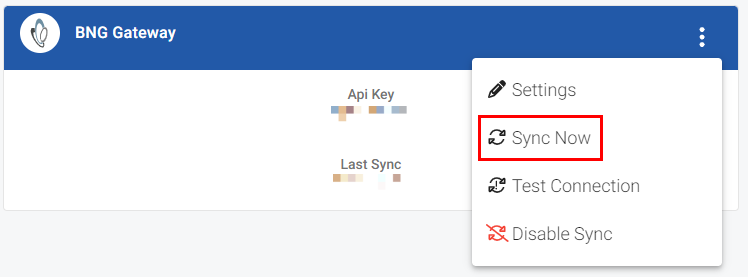
Select Manage found in the lower right corner of your BNG Gateway integration and select Settings.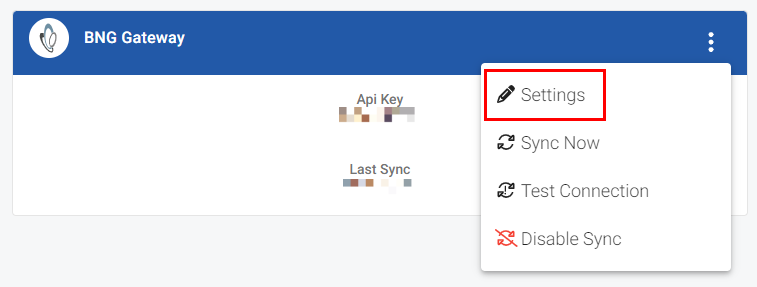
If you do not see the BNG Gateway integration in your portal, please submit a ticket through our Helpdesk.
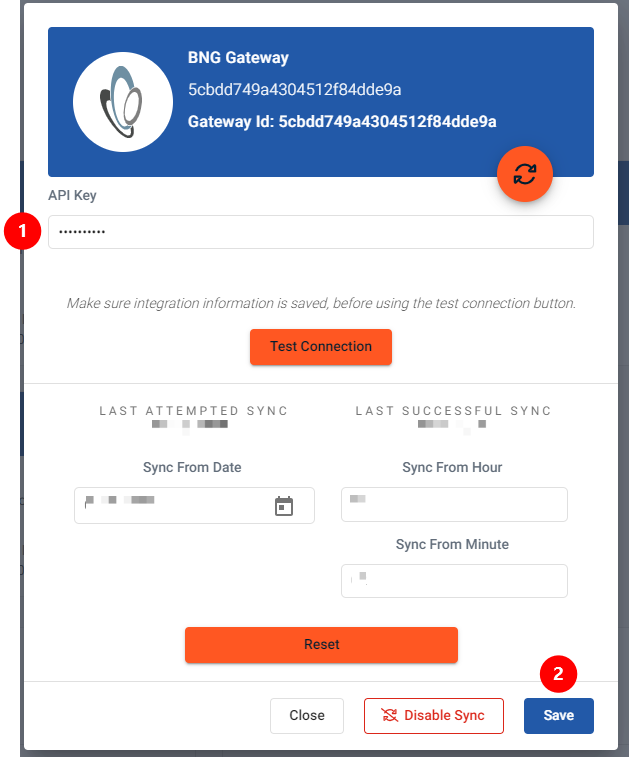
-
Enter the API Key created in Part 2 above.
-
Save
Running your first sync
Once you've confirmed all steps above have been completed, you will then want to click Manage in the lower right corner of your BNG Gateway integration and select Test Connection.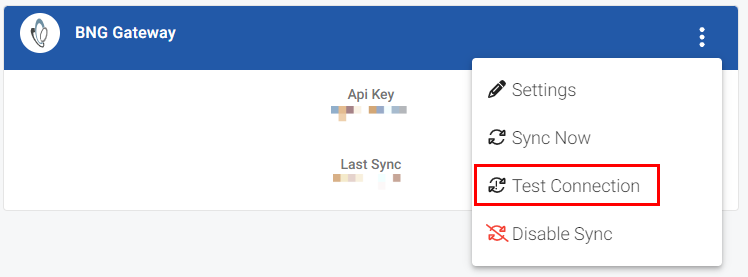
You should then see a successful test notification appear in the lower left-hand corner. Once this confirmation is seen, you can then select Manage in the lower right corner of the BNG Gateway integration and select Sync Now.